
Sun Tzu, the renowned strategist, once said “Know your enemy and know yourself and you can fight a hundred battles without disaster.” So how does a Red Team operator be as cool and knowledgeable as Sun Tzu? How can a Red Team operator “Know the enemy”? In this context I do refer to the Blue Team side of things as the enemy, and I thought, wouldn’t it be a Sun Tzu strategy to practice what the enemy practices, to truly know such tactics to overcome them? I find a ton of value in hands-on labs, anything that keeps me engaged, I tend to just learn best this way. Lately, I have been wanting to set up and poke around at defensive mechanisms, IDS/IPS, WAF, EDR, etc. I want to know how challenging these tools are to set up, configure and maintain. I spent the last several weeks failing to figure out how to properly stand all these tools up. Partly due to incompatible hardware / software mix, and mostly due to me just trying to do too many things I know too little about. Imagine that! But what we do strive for here on these blogs is to state our shortcomings along with our victories. Demonstrate that at any point in our journey of cyber-awesomeness, we still do not know everything, and continue to take on new challenges to learn and grow. First, I’ll chat about our recent raspberry pi 5 hardware upgrades, what went well and worked while setting up Suricata IDS.
Part 1: Raspberry Pi Hardware upgrades
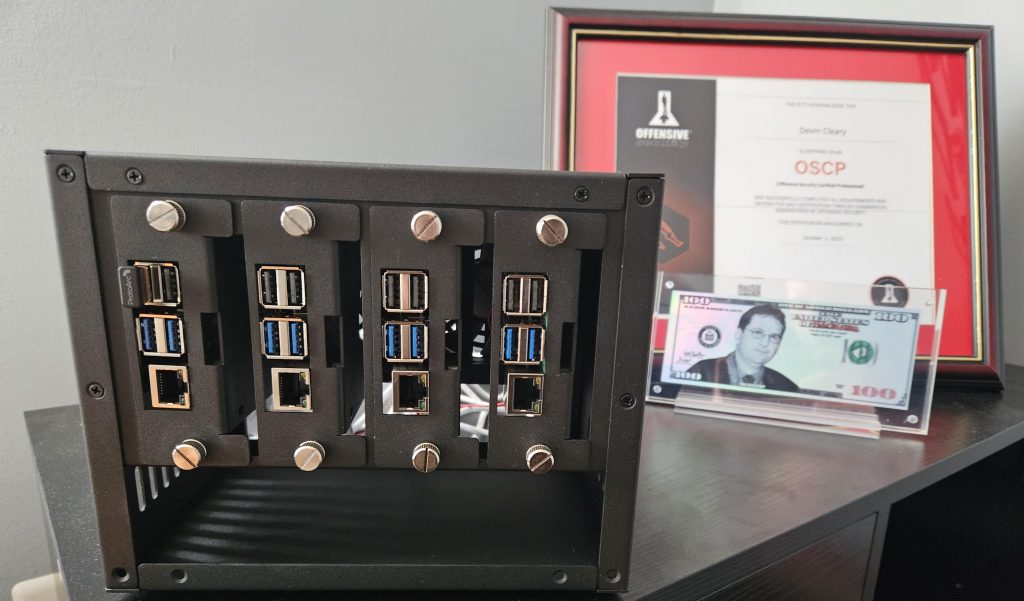
Here’s how we started out our journey, 4 raspberry pi 5’s, basic cases, 32 GB SD cards. As we are new to the world of these cool little devices, we noticed the attention around the on-board support for nvme and wanted to explore taking advantage of that.

Below are the items purchased off Amazon to support this effort to beef up our pi lab environment:
- Geekworm X1001 PCIe to M.2 Key-M NVMe SSD PIP PCIe Peripheral Board for Raspberry Pi 5
- SK hynix BC711 128GB PCIe NVMe M.2 2230 Gen 3 x 4 SSD, 0X3K2X, HFM128GD3GX013N, OEM Package
- UCTRONICS Upgraded Complete Enclosure for Raspberry Pi Cluster, Compatible with Pi 5, 4B, 3B+/3B, and Other B Models, House Up to 4×2.5″ SSD, Support
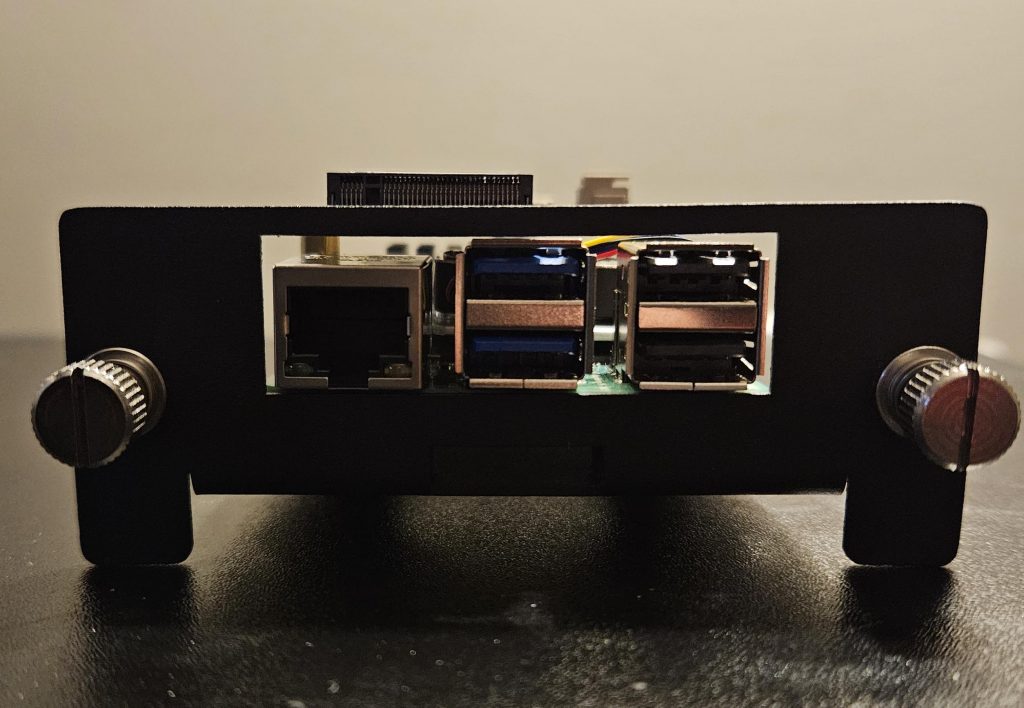
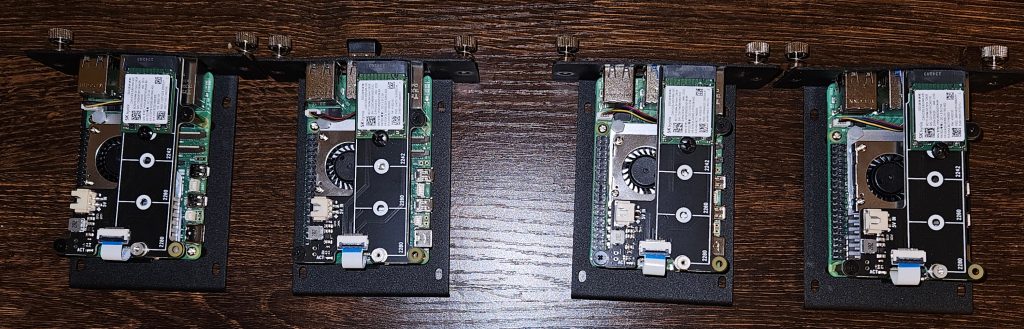
Below are some pictures of the pi’s once the new hardware was attached. All went pretty smooth, however it’s worth discussing the slight miscalculation on my part of not ordering 2280 nvme size! Notice the raised threaded platform the screw at the top left picture. I had to utilize a spare screw to (somewhat) properly secure the 2230. Whoops! Surprisingly all worked out well in the end.

Part 2: Suricata
Now that the hardware is all in place, I can move on and start learning IDS stuff. While looking into and researching IDS evasion, I could not find any that shows what it looks like to run the commands, and what the alerts look like as well. I’ve known of Snort for quite a while, I’ve seen a bit of chatter around Suricata, which is what I will use moving forward. I stood up a DVWA container on 1 raspberry pi (hostname: Kenny) and performed nmap scans from another raspberry pi (hostname: cartman). Below is how I installed and configured the tool:
sudo apt install suricataHere we are needing to find our CIDR to provide to the Suricata configuration:
ip a s
sudo nano /etc/suricata/suricata.yamlI modified the following variable to match my pi subnet: HOME_NET: “[192.168.0.0/24]”
Verify Suricata is not running:
sudo service suricata statusTest Suricata with configuration:
sudo suricata -T -c /etc/suricata/suricata.yaml -vStart Suricata:
sudo systemctl start suricata.serviceCheck to ensure it is running properly:
sudo service suricata statusTest Suricata:
curl http://testmynids.org/uid/index.html
sudo cat /var/log/suricata/fast.log
Custom Rules
To really get a feel for the rules, I decided to remove the default `suricata.rules` file so I can focus on creating my own rule to test against. I do want to enable `suricata.rules` afterwards and test again against it.
sudo systemctl stop suricata.serviceMade a new rules file:
sudo nano /etc/suricata/rules/local.rulesCreated a new alert rule for when any IP within the 192.168.0.x range connects to 192.168.0.251 HTTP:
alert http $HOME_NET any -> 192.168.0.251 80 (msg:"HTTP Traffic to 192.168.0.251"; sid:1000002;)Included my new local.rule file to the suricata.yaml and commented out the default suricata.rule:
sudo nano /etc/suricata/suricata.yamlCTRL+W: `rule-files`
rule-files:
#  - suricata.rules
  - local.rules
Validate config:
sudo suricata -T -c /etc/suricata/suricata.yaml -vI then started the service again:
sudo systemctl start suricata.serviceHere are 2 ways of checking logs while testing:
sudo tail -f /var/log/suricata/eve.json | jq 'select(.event_type=="alert")'OR:
sudo tail -f /var/log/suricata/fast.logI’m choosing to test with the fast.log option.
I want to make sure my custom alert works as intended, so I try a simple nmap command to trigger Suricata:
sudo nmap -vvv 192.168.0.251 -sT -p 80 -sC
Perfect, I can see Suricata logs trigger and log HTTP activity from the baseline nmap scan, just as the alert rule is meant to do. As root, I run a quick echo command to wipe the log clean for the next test:
echo "" > /var/log/suricata/fast.logThe following tests are explained in more detail on following resource: https://nmap.org/book/man-bypass-firewalls-ids.html
There is no magic bullet (or Nmap option) for detecting and subverting firewalls and IDS systems. It takes skill and experience. A tutorial is beyond the scope of this reference guide, which only lists the relevant options and describes what they do.
https://nmap.org/book/man-bypass-firewalls-ids.html
Well that’s good to know as we move into some testing.
Testing Phase
Now that we have our testing environment set up, we can finally start throwing some basic nmap scans against it. With our simple Suricata rule we created in local.rules, the alert will only show if a connection is made, and nothing else. I’ll demo more advanced rules afterwards:
nmap 192.168.0.251 -p 80This triggered no alerts, and only told us that port 80 is open. I next append a -sV to see if getting the server version triggers the Suricata alerts:
nmap 192.168.0.251 -p 80 -sV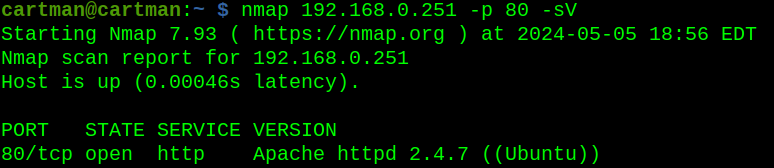

Sure enough, enumerating for the Apache version triggered the alert. After wiping the logs as done in my pre-run, I remove the -sV, and test with -sC, running scripts:
nmap 192.168.0.251 -p 80 -sCThis did trigger the alert as well. In fact, the only scans that did not trigger the Suricata IDS system, are the simple nmap scans. It was not until I included either -sV or -sC or both did I get picked up.
Now that I’ve done a little of testing against a custom rule, I want to re-enable the suricata.rules, disable my custom rule, and do some poking:
sudo nano /etc/suricata/suricata.yamlCTRL+W: `rule-files > remove the “#” from the suricata.rules file, and I commented our my local.rules now that I have gone through the steps of creating and testing a custom rule.
rule-files:
  - suricata.rules
 # - local.rules
Restart the Suricata service:
sudo systemctl start suricata.serviceI wonder how many rules are found within the default suricata.rules file:
cat /etc/suricata/rules/suricata.rules | wc -l48913
Wow that is a big number of rules! Now with the Suricata rules enabled, I ran the same pre-test command to trigger alerts:
sudo nmap 192.168.0.251 -sT -p 80 -sC
Nice, so now with those extra rules enabled and in place, we see all sorts of new information. Unlike our very simple custom rule, Suricata is now able to specifically identify possible nmap activity, as we see at the bottom. This seems like a great time to run through specific nmap commands and see if maybe we could find a way to sneak past these nmap-specific alerts. Since I have access to both hosts, Cartman and Kenny, I am able to install Wireshark and analyze these packets, troubleshoot what gets caught and what does not. After getting Wireshark up and running, I ran an nmap command that I know triggered the Suricata rule set:
nmap 192.168.0.251 -p 80 -sV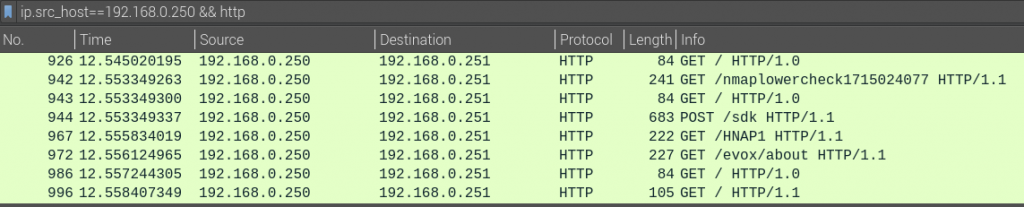
What returns in Wireshark is just a handful of traffic packets. Within here, I need to discover what triggers the IDS rule. It does not take long to see that nmap uses it own User-Agent value:

So with that in mind, I just need to craft a new nmap command to test this theory out:
nmap 192.168.0.251 -sC -sV -p 80 --script-args http.useragent="Mozilla/5.0 (Windows NT 10.0; Win64; x64)"
BOOM! Just like that, we have been able to bypass the specific nmap detection! From here, I was free to use -sV and -sC as freely as I liked, and no alerts from Suricata in my face. Sure, there are other solutions to fingerprinting a web server without nmap, using tools such as Wappalyzer, Whatweb, curl, wget, nc etc, but it sure is fun to stand up these environments and get a good look at what is really going on. For recommendations on Firewall/IDS bypass with nmap, check out their resource here.
From here, I want to do some more poking, learning how these rules work. I also want to start setting up Wazuh SIEM environment before jumping into the Evading EDR book I recently picked up. Basically, wanting to set up some form of a SOC, and better understand both red and blue side of things. Thanks for joining me on this part 1 adventure, I look forward to uploading part 2 in July!